| Liberation 1944:
Scenario Preview, Part One
By Mike Bennighof, Ph.D.
April 2021
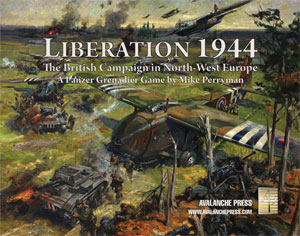 Liberation 1944 is designer Mike Perryman’s Panzer Grenadier game featuring the British drive out of Normandy and across northern France. Today we start a look at the game’s 41 scenarios. You can see Part Two here, Part Three here, Part Four here and Part Five here. Liberation 1944 is designer Mike Perryman’s Panzer Grenadier game featuring the British drive out of Normandy and across northern France. Today we start a look at the game’s 41 scenarios. You can see Part Two here, Part Three here, Part Four here and Part Five here.
SCENARIO ONE
Surprise at Le Hamel
6 June 1944
The planners for Operation Overlord considered the possession of Le Hamel essential to securing Gold Beach. The plan called for the 1st Hampshires to hit the beach then move quickly to subdue the village aided by some armor. In the confusion of battle the infantry arrived in good shape five minutes ahead of schedule, but the tanks ran into difficulties and only a handful supported the attack.
Conclusion
The massive preliminary bombardment spared Le Hamel to a great extent, and the Germans made generous use of mines in fortifying the area. To make matters worse, the defenders were not the inexperienced volksgrenadiers the Brits expected, but rather veterans of the 352nd Infantry Division. The Germans turned back the first attack of the 1st Hampshires, killing their commander and second in command. After regrouping and receiving an infantry company from the second wave as reinforcements as well as some late-arriving armor, they launched another attack. This time they gradually forced back the Germans, and by 1600 Le Hamel fell into British hands. After a short break, the British advanced further westward and seized Arromanches before calling it a day.
 Commentary Commentary
This is a relatively small scenario, with British infantry backed by the “funnies” of 79th Armoured Division pressing forward against well-fortified defenders. Besides the support of close-support tanks, the Brits also have rocket-firing Typhoon fighters on call and some pretty awesome naval gunfire support. They’re going to need them all.
SCENARIO TWO
A Good Day
6 June 1944
The 1st Dorsets spent the first half of the war as part of the Malta garrison, and then took part in assault landings on Sicily and at Reggio di Calabria in Operation Baytown. Well-experienced in hitting enemy-held shores, the Dorsets managed to clear their sector of Jig Beach quickly, then started their advance inland towards Bayeux. With the landing going smoothly reinforcements soon arrived to help.
Conclusion
The 1st Dorsets gathered up the ready armor and two infantry companies from the second wave and worked their way far enough to the south of Le Hamel to avoid becoming entangled in the vicious fighting there and swung west. While unable to reach Bayeux they did subdue Ryes. These accomplishments, along with the capture of Arromanches, secured the beachhead from the west.
 Commentary Commentary
This time the Germans aren’t quite as well-fortified, which is a good thing for the British “Malta Brigade” because they can’t call on quite as much support as last time. It’s another tough infantry fight over three boards.
SCENARIO THREE
Collision Course
6 June 1944
On King Beach the flail tanks and AVREs landed with the first wave on schedule, clearing the beach in an orderly manner. The only rough spot appeared when the left-hand battalion briefly stalled at the seawall, but a call to the supporting naval vessels quickly straightened that out. Afternoon found the 6th Durham Light Infantry and their supporting armor passing through Villiers le Sec and turning west towards Bayeux. This put them on a collision course with Kampfgruppe Meyer who, after a futile attempt to locate American paratroopers around Carentan, had returned and attacked towards Crepon.
Conclusion
Before Kampfgruppe Meyer could move eastward they detached their Sturmgeschütz and an infantry battalion to deal with problems at Omaha Beach. Without these forces Kampfgruppe Meyer failed to stop the British despite pressing home the attack. When the smoke had cleared their commander was dead and the infantry was driven over the Seulles River (just to the south of the map) with heavy loss of life. Some German accounts say less then ninety men worked their way back to friendly lines.
 Commentary Commentary
A mob of low-morale German infantry, with a scattering of tank support, takes on a high-morale battalion of Brits backed by tanks and air power. It’s not going to be pretty for the Germans, who have a lot of troops and are going to see most of them wiped out.
SCENARIO FOUR
Planned Success
6 June 1944
With 60 percent of their men accounted for at 0230, the 12th Parachute Battalion moved out to liberate Le Bas de Ranville. Surprisingly, by 0400 they managed to take the village and the surrounding high ground without encountering the enemy. This position formed a solid southern anchor for the defenses. When the 13th Parachute Battalion overcame the defenders of Ranville they completed the eastern defense. While they completed their work the gliders carrying the antitank units landed and the gunners quickly moved to support the paratroopers.
Conclusion
Once the Germans got a handle on the situation the 125th Panzer Grenadier Regiment launched a substantial effort to reclaim Ranville. However, the British had chosen their positions wisely and the high ground around Le Bas de Ranville allowed them to dominate the fighting. Ranville was never threatened. The Germans regrouped and tried again but were no more successful than they had been the first time.
 Commentary Commentary
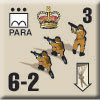
The Paras mark their first appearance in the Panzer Grenadier series, including airborne tanks. The Brits have sky-high morale and actually outnumber the Germans, who are tasked with attacking these supermen from the sky.
SCENARIO FIVE
St. Gabriel
6 June 1944
The 5th East Yorkshires landed near La Riviere but the German defenders immediately pinned them down behind the seawall. A call to the supporting naval vessels soon put an end to that obstacle. They then encountered a concrete gun emplacement that a flail tank knocked out, followed by clearing La Riviere at a frightful cost. The troops then advanced to Ver sur Mer where they passed through the Green Howards and assaulted Crepon. The attack ran according to plan until the lads neared St. Gabriel.
Conclusion
Before leaving Ver sur Mer the battalion combined Companies C & D due to heavy casualties. In the fighting at St. Gabriel the new company commander fell wounded while leading his men. Nevertheless, the British prevailed and pushed on to Brecy just 2,000 yards shy of their objective before ceasing their attacks for the day at 2300 hours.
 Commentary Commentary
This is a one-board scenario, with the British on the attack against a small group of German defenders. The Brits have numbers, tanks and naval support; the Germans just have to do the best they can.
SCENARIO SIX
One-Two Punch
6 June 1944
The plan called for the British 3rd Infantry Division to land on Sword Beach and secure Caen by the end of the first day. Led by the respected Scotsman Major General Tom Rennie, the division would give their all in pursuit of this tall task (probably not feasible from the outset). The 8th Infantry Brigade spearheaded the landing supported by a battalion of duplex-drive Sherman tanks. As soon as possible after the landing 1st South Lancashires received the task to clear Hermanville sur Mer and press southward.
Conclusion
With 31 of the 40 Shermans making it ashore in addition to a number of “Hobart's Funnies,” the British cleared Hermanville sur Mer rather easily. By 0945 they’d opened six of the eight exits from the beach and anticipated the second wave of commandos who would relieve the paratroopers holding two bridges to the east. By 1030 the next infantry brigade and General Rennie had assembled ashore. Unfortunately, although the Brits quickly cleared Hermanville sur Mer, the Command Post for the 736th Grenadier Regiment (Codename Strongpoint Hillman) held out until late afternoon complicating British efforts to advance inland.
 Commentary Commentary
This is a big scenario, with all four boards in play and large forces from each side. The Germans have entrenchments and minefields to bolster their positions, but the Brits bring flame-throwing tanks, air support and naval gunfire to back their assault.
SCENARIO SEVEN
21st Panzer Responds
6 June 1944
German plans called for an immediate strong armored counterattack to push any Allies who came ashore in Normandy back into the sea. Reality didn’t match the plans as the German commanders debated whether this was the real invasion or just a diversion. It was late afternoon before the panzers clanked forward.
Conclusion
The attack kicked off at 1600 -- much later than the plan called for. The British blunted the east wing of the attack at Bieville claiming 10 enemy tanks destroyed. The west wing broke through the patchy defense and reached the coast at 2000 hours splitting Juno and Sword Beaches. But an hour later the Germans decided to withdraw when the 6th Airlanding Brigade passed overhead and landed behind them, potentially cutting them off.
 Commentary Commentary
Now the Germans get to attack, with a mixed bag of tanks supported by infantry. The British are outnumbered but have high morale and some tank support of their own.
SCENARIO EIGHT
Seeds of Defeat
7 June 1944
Though the German plan called for a strong counterattack to drive the Allies back into the sea once they landed in Normandy, due to indecision and Allied airpower only the 21st Panzer Division had attacked as planned with mixed results. With the SS Hitler Youth Division arriving during the night, both panzer divisions would attack in the morning. That was the plan anyway.
Conclusion
The Canadians attacked first, preempting the German plan. The German commanders decided to let the Canadians over-extend themselves before launching their own attack. During the waiting the battle sucked in more and more of the 21st Panzer Division against the Canadians leaving a lone panzer platoon to support the Hitler Youth’s effort. According to German accounts the SS troops managed to take Cambe anyway, and then drove the British back before pulling back themselves. This rings true as the British declined to follow when the Germans withdrew. In the long run, it made little difference. The piecemeal commitment of available panzers on the defensive doomed the envisioned grand offensive, likely sowing the seeds of later defeat.
 Commentary Commentary
It’s a meeting engagement on a long, narrow playing area. The SS juvenile criminals have very high morale and an edge in numbers, artillery and mobility. The British are mostly on foot but have pretty good morale of their own and only need to frustrate the Germans to win.
And that’s all for this installment.
Join the Liberation! Order right here.
Sign up for our newsletter right here. Your info will never be sold or transferred; we'll just use it to update you on new games and new offers.
Mike Bennighof is president of Avalanche Press and holds a doctorate in history from Emory University. A Fulbright Scholar and NASA Journalist in Space finalist, he has published vast tracts of books, games and articles on historical subjects.
He lives in Birmingham, Alabama with his wife, three children and his dog, Leopold.
|
