Herring Under Fur Coat (Herring Salad)
June 27th, 2009 in Salads by Julia Volhina
Total cooking time: 3h
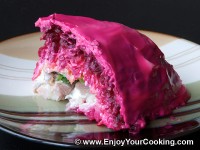
To prepare russian herring salad, “Herring Under Fur Coat”, you need to have whole salted herring. And of course you need to know how to fillet it, so read this post if you don’t.
Herring Under Fur Coat is a word-to-word translation of russian name of this salad: “Seledka pod Shuboj”, which represents salted herring under a “coat” of boiled vegetables. So, as you’ve probably guessed, you will also need boiled vegetables (potatoes, carrots and beats) and green onions. In the rest, this is 5-layers salad with a lot of mayonnaise.
This salad requires some time and agility to assemble it, also it needs at least 12 hours for layers to soak after it is assembled. So make sure you have enough time before you plan to serve it.
Ingredients:
- 1 big or 2 small whole herrings (pickled with a salt)
- 1 big potato
- 3-4 medium size carrots
- 3 medium size beets
- Bunch of green onions
- Mayonnaise
How to make, step-by-step:
-
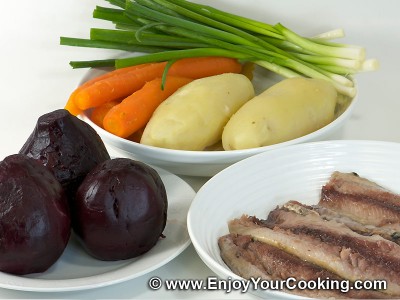
Prepare ingredients: boil carrots, potatoes and beets for salad, let them cool till room temperature and and skin; fillet salted herrings:
Herring Under Fur Coat (Herring Salad) Recipe: Step 1 -
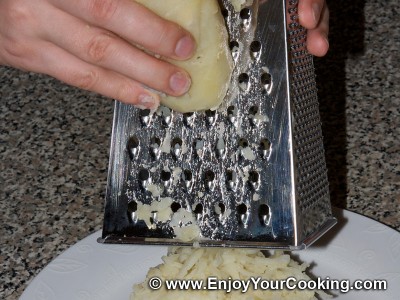
Take big flat plate, grate boiled potato on big slots of grater and form round layer in the middle of the plate (make sure you have about 2 inches left till the edges of the plate):
Herring Under Fur Coat (Herring Salad) Recipe: Step 2 -
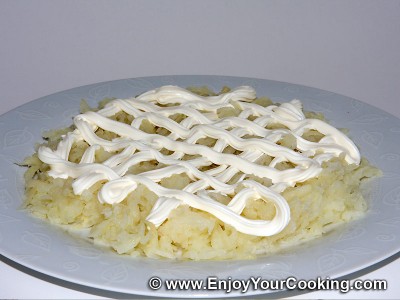
Dress layer of grated potato with mayonnaise (yes, you need liquid mayo which is easy to pour):
Herring Under Fur Coat (Herring Salad) Recipe: Step 3 -
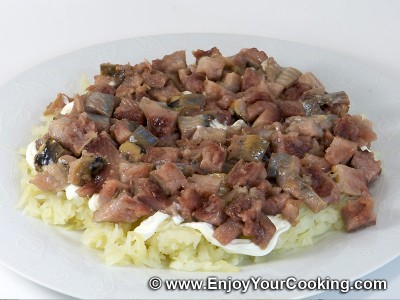
Dice herring fillets (and pick bones if you see any) and layer it above potato:
Herring Under Fur Coat (Herring Salad) Recipe: Step 4 -
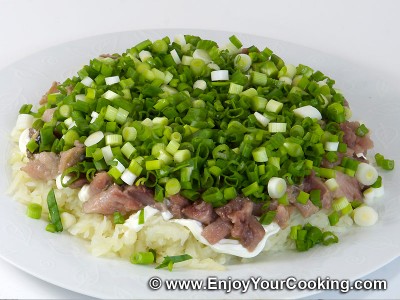
Add chopped green onions as third layer and dress with mayonnaise:
Herring Under Fur Coat (Herring Salad) Recipe: Step 5 -
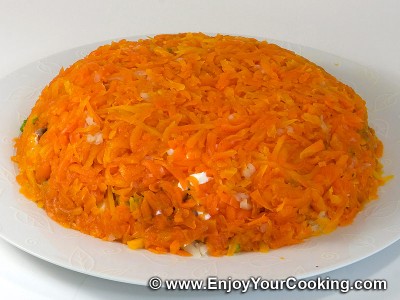
Cover whole thing with an even layer of boiled carrots grated on big slots, use your hands to form the shape:
Herring Under Fur Coat (Herring Salad) Recipe: Step 6 -
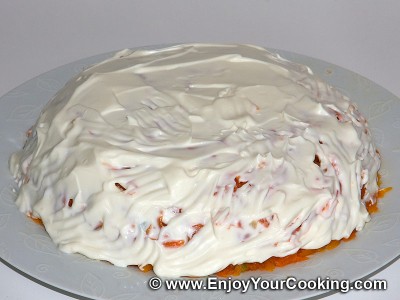
Spread mayonnaise on the surface:
Herring Under Fur Coat (Herring Salad) Recipe: Step 7 -
Cover whole thing with an even layer of boiled beets grated on big slots:

Herring Under Fur Coat (Herring Salad) Recipe: Step 8 -
And again cover it with mayonnaise:
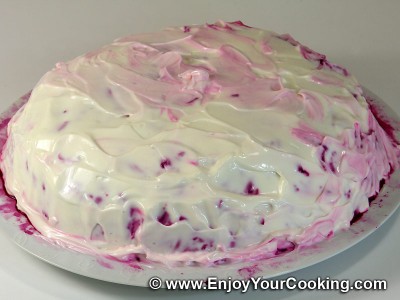
Herring Under Fur Coat (Herring Salad) Recipe: Step 9 -
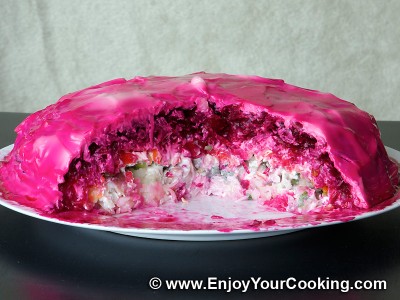
Let salad to rest at room temperature for 2 hours, after put it to the fridge. Prepare this salad in advance, it needs at least several hours of “rest” after assembled so layers can soak juices of each other and mayonnaise. I usually prepare this salad night before I am planning to serve it:
Herring Under Fur Coat (Herring Salad) Recipe: Step 10 -
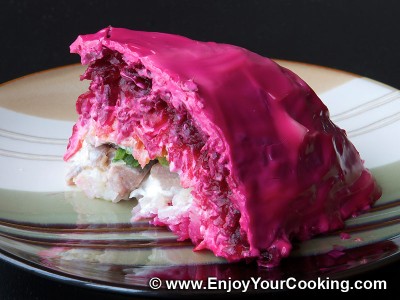
Herring Under Fur Coat or Seledka pod Shuboj (how it is called in Russian) is ready to be served:
Herring Under Fur Coat (Herring Salad) Recipe
can i use Mackerel for this salad?
Salted one you can, you can also use salted/smoked salmon, it will work great too, just that it will be a bit less budget version of the salad and you will need to figure out amounts.
I linked back to this recipe on my blog and recommended it to all my friends 🙂 Thanks for a great step-by-step explanation.
Thank you!
This is how I learned to do it from my grandma. Nothing but praise every time I make it for Russian company, even compare to other shuba they’ve had.
Herring on the bottom lying on a very thin layer of vegetable oil, chopped into small cubes. Whole fish is best, but lightly marinated is more appropriate for western palettes.
Thin layer of very thinly sliced non-sweet onions on top. It’s the only ‘sharp’ flavour in the salad. The onions might seems bitter, but you need them to contrast the sweet vegetables.
The boiled potatoes go on top on the onions. Do not grate, chop into small (1/4″) cubes.
Hard boiled eggs on top of potatoes, chopped into cubes as well. You need hard boiled eggs, they break up the starchy layers of the vegetables and substitute for extra layers of mayo.
APPLES!!! Secret ingredient. Thin layer diced into tiny cubes on top of eggs. It counters the sharp taste of the onions and balances the sweet flavour of the beets with it’s tartness. The apples give the salad a perfect balance of flavours.
Grate or chop carrots on top of apples. Grated beets go last. Make sure there’s enough beets so you can’t see the carrots.
Mayo only on top. I prefer a thin layer, my grandma used to lay it thick (but then again she fried everything in lard, even pancakes). Oh how I love her.
You don’t need mayo in between layers, especially if using hard boiled eggs as a layer, the taste will be there and juices from the beets and other vegetables (and mayo) will permeate through while the salad is resting to make it moist and delicious throughout. Rest at least 6 hours, 12 or more is better. If serving for a party, make it the night before and refrigerate overnight.
Hi! I tried this recipe last Saturday. It was fun to cook it, though I found it easier to mash potatoes and carrots with fork instead of grating them. I ran out of mayonnaise during cooking, but the salad was a success. I let it rest in the fridge till Sunday (yesterday). I ate it right away with my wife, and we enjoyed it. Thanks for the recipe!
I am glad you liked it 🙂
Sorry to double post, the fist layer I mentioned in the last comment should be the last one you layer into the salad bowl. When you put the salad upside down, the fish would be at the bottom. ^.^
Good recipe, but as mentioned, the fish layer should be on the bottom.
The best way to achieve the shape is if you did it in a bowl. My mum would line a deep bowl with cling film, then layer on the fish first, followed by all the other ingredients (don’t forget the egg!), then get a flat bottom dish the diameter being the same size as the top of the bowl you’re using, and press down firmly so that the salad top is straight. Then cover and rest in the frige.
After that when you take it out for serving, just place the salad upside down onto a plate, remove the cling film and you have a nicely shaped salad to cut and serve! It looks better to the eye and everything is horizontally straight inside 🙂
Loving your recipes!
You don’t have to use a lot of mayo, just spread a couple oh tsp. between the layers and have a little more mayo on top, its will be enough. And I put the fish layer on a bottom followed by a thin layer of finely chopped onions and then I put potatoes, chopped egg whites, carrots and beets.
Love this salad! Used to buy, make, eat it back when I was in Russia! 🙂
back in june of last year i tried this recipe for the first time and since then i’ve made this dish for my boyfriend and some russian party’s several times and i’m telling you they ” Love It ” and so do i, I’m now called the “Black Russian”, My boyfriend is Russian and I’m African American so i really appreciate your recipes, they help me to make him the happiest Russian alive, lol…..(laugh out loud!) Spaceeba! (thank You) can u help me to make something sweet for him that’s tasty?
This cake is pretty russian and not that hard to cook, maybe try it out.
I am very glad you have patience to cook “herring under fur coat”, your boyfriend is a lucky guy 🙂
I made the Sour Cream cake recipe (smetannik) you suggested for me to make and i must say ” IT WAS DELICIOUS”. I never thought in my life sour cream would taste so wonderful on cake maybe in Borsch, the cake was very easy to make and even easier to eat. I just love your recipes and so does Boris now he wants me to make Kiev Torte and i’m sure you can help me. It’s his birthday in a week and i would love to give him Russin Dinner at home and suprise him with Kiev. I wished i could share some pictures with you some kind of way because these dishes always turn out so beautiful. I love pretty food! that taste good. Thank you so much!
I am very glad smetannik worked for you, it is one of my favorites and really-really easy to do 🙂 You are more than welcome to share some pictures, if they are food related I think the best way to do it would be using EnjoyYourCooking facebook page here: https://www.facebook.com/EnjoyYourCooking (you will need a facebook account to do so).
About Kiev Torte I am very sorry to disappoint you: I never cooked it myself, it involves 2 beze layers and those are hard to get right – that is probably why I was always hesitant to even try… 🙁
Kim, girls on facebook recommended this recipe of “Kiev Torte”, to me to get beze layers right is the hardest part, and even then it will probably get some time to make to get layers the same size and shape… I think in worst case you can shape it a bit with knife.
Will try to make it myself when we are done with moving in into our new house :))
I really-really hope it will work for you (but can’t be sure if I got the measurements and translations right). So there recipe is here:
Ingredients:
For 1 layer (You will need 2 layers in total, so double products.):
4 egg whites
1 cup of white sugar
1 cup of hazelnuts, chopped in big pieces
2 tablespoon of starch
For cream:
3 egg yolks
1 cup of white sugar
1 cup of milk
10 oz of butter
1 tablespoon of cocoa powder
How to prepare:
Layers:
– Beat egg whites into strong foam with mixer
– Gradually add sugar and continue until fully dissolved
– Using sieve powder starch over egg whites
– Arrange nuts on top
– And carefully mix with spatula from top to the bottom
– Arrange sheet of parchment paper on baking sheet (or round baking form)
– Pour batter in and even it with spatula
– Warm up oven 340 F, put baking pan in for 20 mins
– Then reduce heat to 300F and continue baking for 1h 40 mins – layer should double in size
– Take prepared layer from oven.
– Increase heat to 340F.
– Prepare batter for second layer the same way as for first and bake it the same way.
Cream:
– Mix egg yolks, sugar and milk in cooking pot
– Put over moderate low heat and cook until thickened, then let it cool down till room temperature
– In softened butter spoon by spoon beat cooked egg, milk and sugar mix
– Then at the end add cocoa
To assemble cake: arrange one layer, spread cream over it; put secant layer over and cover with cream on top and on sides.
Are you in a position to be married?
I need someone like you in my life.
I will make a commitment if you so desire.
I love your cooking… we could at least be friends.
And yes, I have a sense of humor.
Bob (btw)
You made my day 🙂
I am in committed relationship, but thanks for the offer…
I tell you something! This is a great Salad Recipe.
Oh, yes it is!…
You can replace green onion here with just onion. It goes great with the herring (even raw, but if you don’t like the taste, you coul cut onions first, put them in vinegar and leave to marinate while you cut other ingredients). And boiled eggs are essential ^^.
Yep, just onion will work fine here too, raw or marinated.
I don’t agree about eggs, they are nice for decoration on top, but then they get dried very fast if salad is stored more than 1 day in a fridge… I don’t like that. But then, I guess everybody is free to improvise, so feel free to use eggs when you cook this salad.
I disagree, I’ve never had it without the eggs on top (that is what gives it the fur look). My mom grates them but then covers it with plastic wrap till it is served. It stays fresher, and the eggs prevent the wrap from sticking to the top mayo layer. Plus if you do wrap the salad it won’t pick up all the other possibly yucky smells that often come from the fridge. My family also uses regular onions not the green ones, and the hearing is on the first bottom layer with some oil. Everything else is the fur it is under
I’m making this salad right now for my boyfriend but I’m not sure if i should cover the salad or when to cover it. So far so good. I can’t wait to eat it thanx for posting this great dish
You don’t need to cover it, just put to the fridge for several hours after it is assembled, so it can settle down. Hope you will like it!
One of my favorites. I love this stuff! I always eat it when it’s made, but never knew how to make it. Thanks!
You are welcome 🙂
Filleting the herring is really a lot of unneeded work. You can use pickeled herring, even from a jar. It’s not as good, but readily available, and straight salted herring might be a bit much for many American palets.
What this recepie above also does not do, is garnish the salad with slices of hard boiled egg and sprigs of fresh dill. The contrast with purble is quite stunning.
Traditionally I prepare this salad in 9″ round pie plates or a large pyrex oblong pan. this is necessary if you are going to transport the salad.
Dennis, which brand of pickled herring in the jar/pallet you use? I was not able to find a proper one.
I agree,,,,marinated fish is not the same as salted fish….i usually buy in local russian store!
Сохранили мне кучу времени! спс.
Welcome 🙂