Once all the pieces of glass have been cut to shape, painted according to the design, and fired, they are finally ready to be assembled using lead.
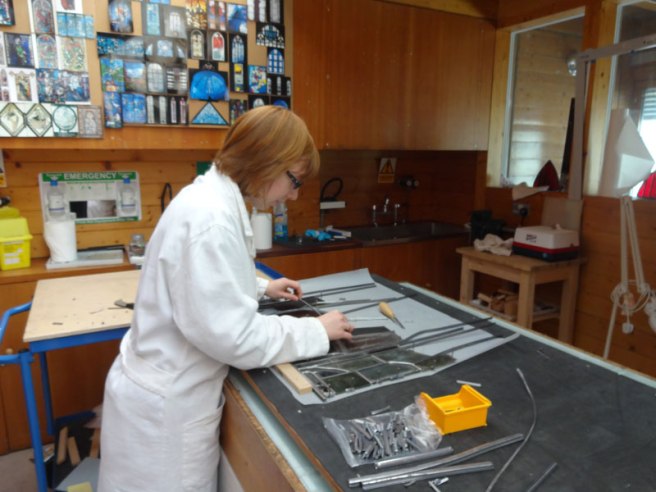
The method used to assemble a stained-glass panel nowadays has changed remarkably little from mediaeval times. According to Theophilus, a 12th century monk, in his treatise “The Divers Arts”; a flat smooth wooden board large enough to take the window panel would have been whitewashed (using powdered chalk and water) onto which the design for the window would be drawn.
When paper first started to be produced it was very expensive and so it was much cheaper, if it was a one-off, to lay out the design for the panel on an assembly table, build the panel on top of it, then, just whitewash the table ready for the next panel. This also made it easier if there were repeated design elements in the panels, such as borders or canopies, for example, as these could be left and only the sections that were different needed to be whitewashed and redrawn. By the 14th century, in Italy at least, there is documentary evidence that paper was being used as standard, as Cennino Cennini writes in his manuscript Il Libro dell’ Arte:
“you will take as many sheets of paper glued together as you need for your windows; and you will draw your figure first with charcoal, then fix it with ink, with your figure completely shaded, exactly as you draw on panel. Then your glass master takes this drawing, and spreads it out on a large flat bench or table; and proceeds to cut his glasses”
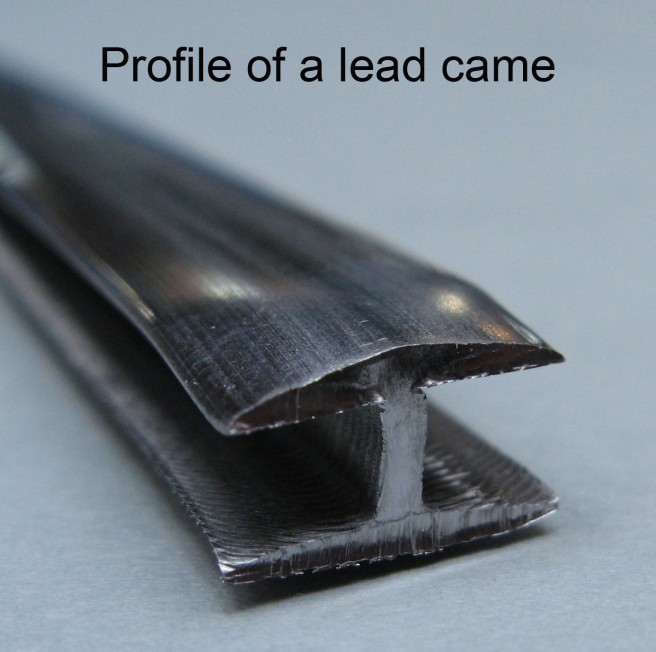
The lead strips used to connect the separate pieces of glass in the panel are called “cames”. The same process of using H-shaped rods of lead has been used since Roman times, and the Latin name for the rods of lead was calamus, so this is probably where the term “cames” is derived from.
In mediaeval times lead was cast in a mould made either from wood or iron. Theophilus describes the process of making an iron mould, which consisted of two parts, hinged at one end, which, when closed created a hollow ‘H’ shaped channel down the centre. Molten lead would be poured into one end then removed once cool. If you didn’t have suitable iron available you could create a mould using wood. Inevitably, this casting process resulted in large variations in the shape of the cames, which were then cut by hand to the desired size, and so are quite uneven and irregular. It was around the 16th century that the use of a lead mill for shaping the leads into a more regular profile was introduced.
The lead used in mediaeval times, although up to 99% pure, still retained a small number of impurities such as silver, tin, copper and antimony, which considerably increased the tensile strength and hardness of the lead at ambient temperatures, making the lead network stiffer and less elastic, and also more resistant to corrosion. During the nineteenth century it became possible to produce lead without all of the other naturally occurring metals which resulted in softer and less durable cames. As a result of this, it quickly became necessary to replace these softer lead cames on a regular basis, which – ironically – lead to the myth that cames would have to be replaced every 100 years or so and to the routine re-leading of medieval windows. This is actually very rarely true, especially with medieval lead which is remarkably strong, and more modern lead which deliberately contains some additional trace metals that give a stained glass panel strength as well as flexibility. The nature of the lead used, the standard of craftsmanship in the construction of the window, and the weathering the window has been exposed to are all key factors which determine the amount of maintenance a window will need. It might need to be re-leaded just a few years after the original panel was made, or it might last for centuries.
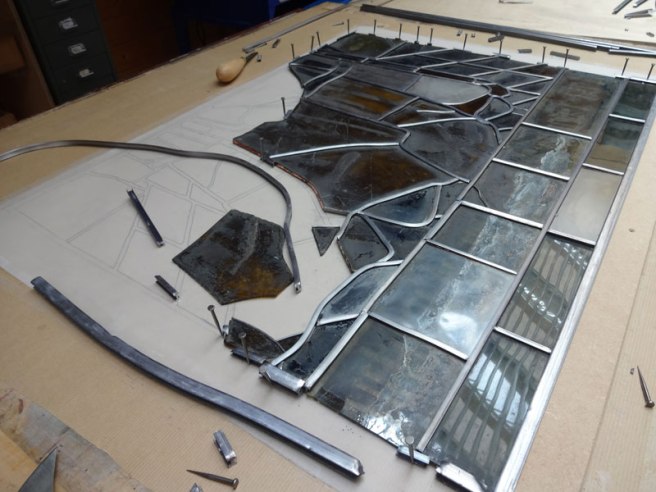
Assembly of a window usually starts at one corner of the panel and gradually works outwards and upwards. Lead strips are cut to length using a lead knife and carefully shaped around each glass section. Horse shoe nails are tapped into the assembly table and added or removed as required to hold the sections together. This process today is almost exactly as Theophilus described back in the 12th century!
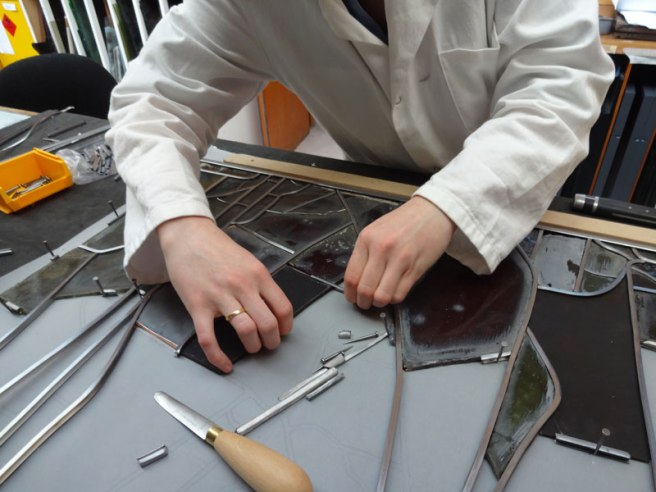
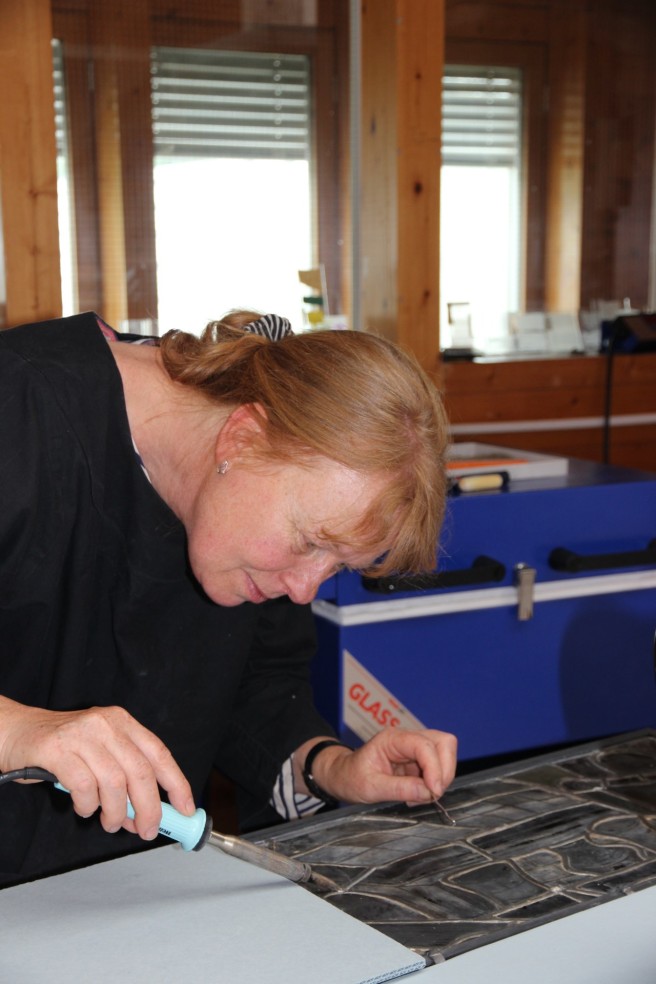
Once all of the pieces of glass have been brought together using lead, the joints where the leads meet then need to be soldered on both sides to secure all the pieces in position. Theophilus explains that the solder (a mixture of lead and tin) was cast in a similar way to the lead cames, using wooden or iron moulds. Each joint would be lightly scraped and wax would be used as a flux during the soldering The soldering iron was long and thin with one end round and shaped to a point. This would be heated with care and much experience because soldering at the right temperature greatly affected the stability of the final window. Not enough heat and the solder will not run and join the cames together securely, too hot and the underlying lead will melt and distort or even burn, potentially damaging the glass beneath.
The final step nowadays, is to cement the panels. This process, in which a putty-like mix of a calcium carbonate and boiled linseed oil is worked between the leaves of the lead cames and the glass pieces, adds greatly to the stability of the panel as well as making it more wind and waterproof. There is however, no mention of this process in any of the treatises before the 15th century which suggests that no cementing took place at this time.